前言
最近发现我的个人博客上的图片无法点击放大,这导致我在博客文章中加入的图片无法看清楚,所以我使用了 jQuery 的 fancyBox 脚本来支持这个功能。
下载 fancyBox
下载 fancyBox 的 css 文件以及 js 文件, GitHub 连接:fancyBox
也可以使用 jsdelivr 提供的文件:
<link rel="stylesheet" href="https://cdn.jsdelivr.net/gh/fancyapps/fancybox@3.5.7/dist/jquery.fancybox.min.css" /><script src="https://cdn.jsdelivr.net/gh/fancyapps/fancybox@3.5.7/dist/jquery.fancybox.min.js"></script>部署
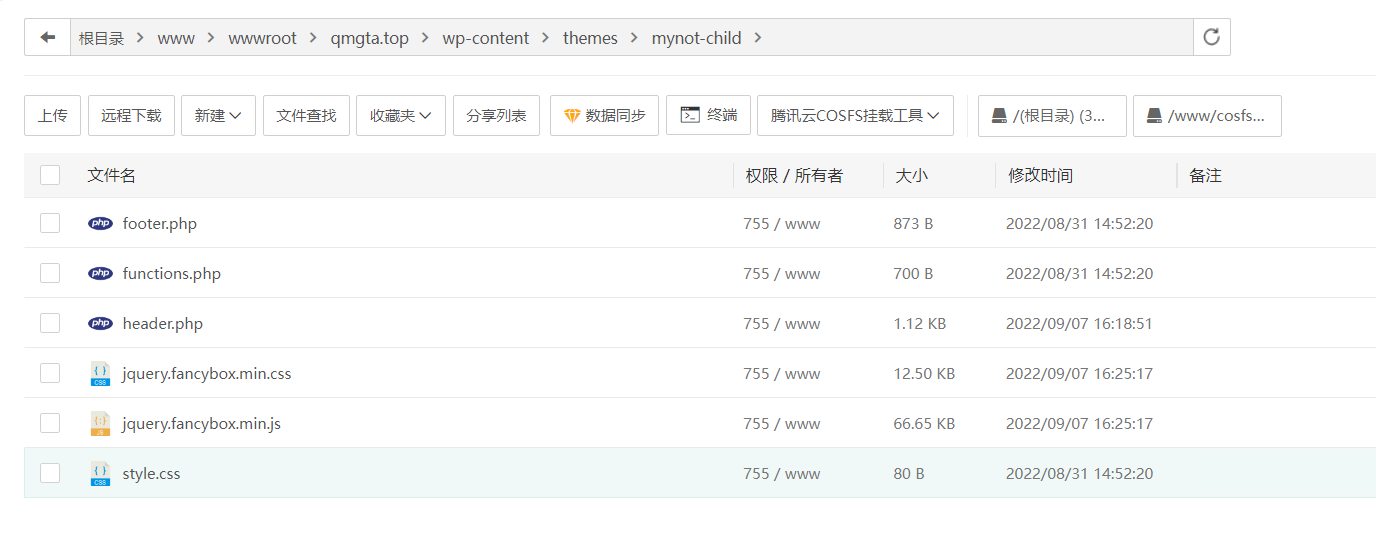
因为我使用了 WordPress 的子主题功能,所以我将我下载的文件放入子主题中
然后需要在 footer.php 和 header.php(这两个文件都是直接从使用的主题中拷贝过来的)中引入刚刚下载好的文件。
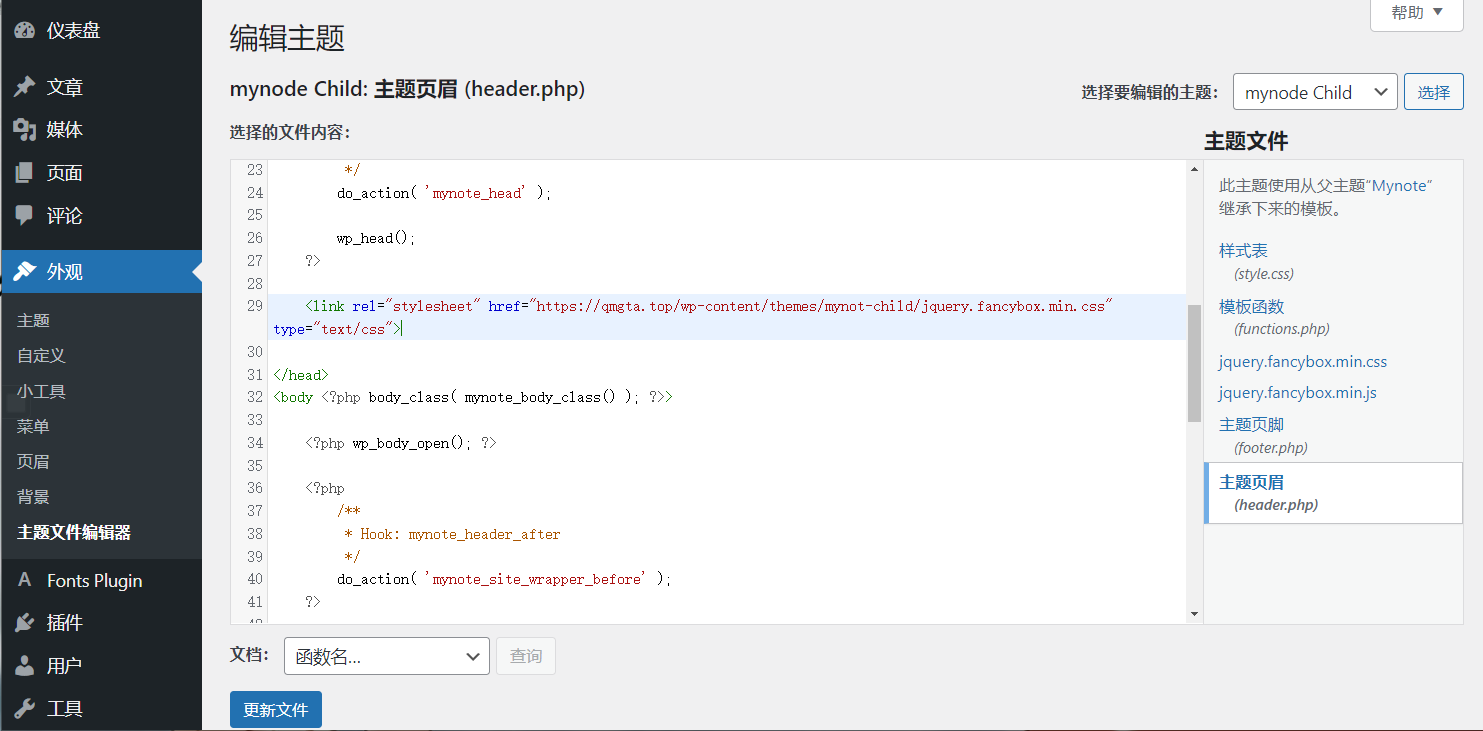
我们可以在 WordPress 提供的主题编辑器中修改文件,也可以直接修改。首先修改 header.php 在 head 标签中加入:
<link rel="stylesheet" href="https://qmgta.top/wp-content/themes/mynot-child/jquery.fancybox.min.css" type="text/css">修改完成后需要点击最下方的更新文件,否则修改不会生效
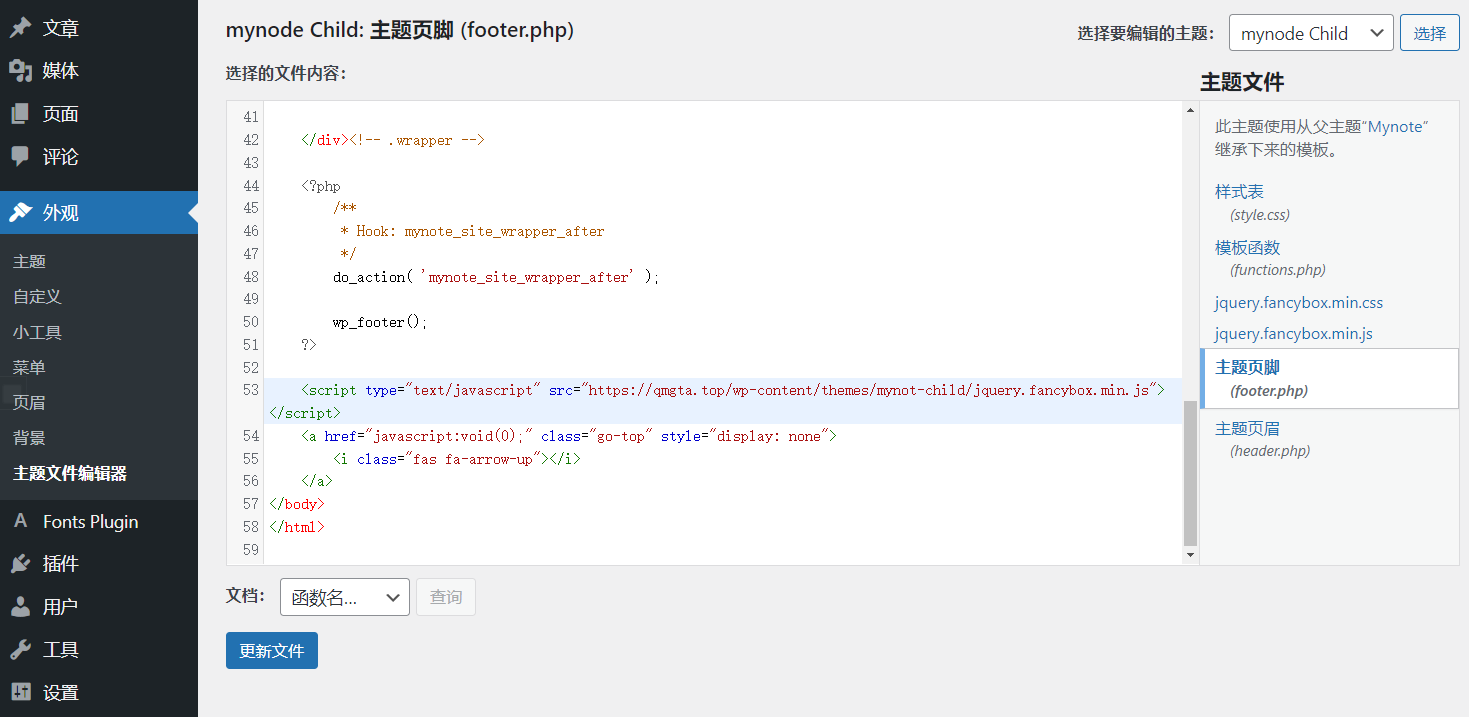
然后在 footer.php 中加入:
<script type="text/javascript" src="https://qmgta.top/wp-content/themes/mynot-child/jquery.fancybox.min.js"></script>过程与前面相同
在最后我们只需要在 functions.php 中加入以下代码:
/**图片灯箱自动给图片加链接**/
add_filter('the_content', 'fancybox');
function fancybox($content){
$pattern = array("/<img(.*?)src=('|")([^>]*).(bmp|gif|jpeg|jpg|png|swf)('|")(.*?)>/i","/<a(.*?)href=('|")([^>]*).(bmp|gif|jpeg|jpg|png|swf)('|")(.*?)>(.*?)</a>/i");
$replacement = array('<a$1href=$2$3.$4$5 data-fancybox="gallery"><img$1src=$2$3.$4$5$6></a>','<a$1href=$2$3.$4$5 data-fancybox="images"$6>$7</a>');
$content = preg_replace($pattern, $replacement, $content);
return $content;
}然后访问自己的博客就有点击图片放大的效果了。


留言